By: Jim Kushner
Mounting a good whitetail buck is a whole lot more than just skinning and “stuffing” it. There are certain steps that need to be followed and like a lot of specialty careers or in my case hobbies, there are some little tricks and procedures that help to make your trophy look great and last a lifetime.
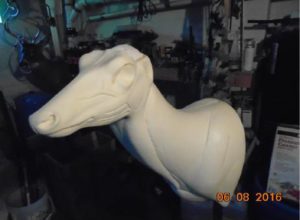
Whitetail Deer Form
The actual supply list for mounting a deer is fairly small but the amount of labor involved is what you ultimately pay your taxidermist for. The most important thing a good taxidermist needs is knowledge of deer anatomy, some artistic ability and most of all, patience.
Nothing here is meant to be a how to or all-inclusive, but to be entertaining and give you an idea of some of the things involved in bringing a set of antlers into a trophy that lasts a lifetime.
One of the most important things you can do to assure you get a quality mount is to cool the deer as soon as possible and then get the hide & head to the taxidermist as soon as you can. He will take the hide and antlers off the skull and prepare the skin for tanning. Some taxidermists do their own tanning and some send the hide out for tanning.
So, what are the steps involved and what is needed for a quality mount? First of all a sharp knife is key to the first part, skinning and tanning. Once you drop off the head and hide the taxidermist will take some measurements to make sure the form and hide fit together later and then he has to carefully skin out the whole head making sure not to cut any holes in it, especially around the eyes and nose.
 Then he will remove the ear cartilage, a somewhat tedious process where patience becomes important. After the hide is carefully fleshed the tanning process begins. Once that is done the mounting can start. An important note here, never hang a deer you want mounted by it’s neck. Take as much care as possible to keep from damaging the hair and hide. Small cuts and holes can be repaired but missing hair or a cape cut too short cannot. There are numerous instructional articles as to where to cut the hide for a quality mount. If you are unsure call your taxidermist and ask or just take the whole hide to him after skinning. He will cut off what he doesn’t need.
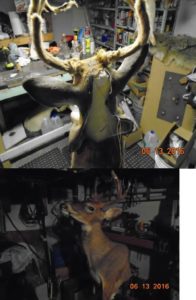
 This buck was taken during the youth hunt and is still in velvet. It is not recommended to leave the untreated velvet on as it will eventually start to smell. The lucky young hunter who took this deer asked to leave it on anyway. There is a process for preserving velvet but it must be done soon after killing the animal. There are also a few companies that apply a very realistic looking artificial velvet to antlers for additional cost.
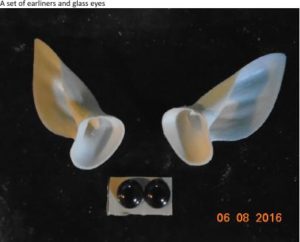
I always test fit the hide to the form , sometimes the form needs to be altered to fit the hide. This is especially true when mounting early season bucks and younger deer. A bucks neck can swell a lot as the rut approaches and most forms are made to accommodate that. Clay is used to build up ear bases and around the eyes and other areas of the form.
There is a piece of plywood molded into the head and back of the form for attaching the antlers and for mounting the finished product to the wall. After caping the antlers are removed from the head leaving a small section of skull that is later attached to the form with screws. I like to take measurements before removing the antlers from the head so that the finished mount looks as much like the live deer as possible. Not all bucks are created equal and some are just plain strange, the reason some bucks warrant mounting, not just because they qualify for Boone & Crockett records.
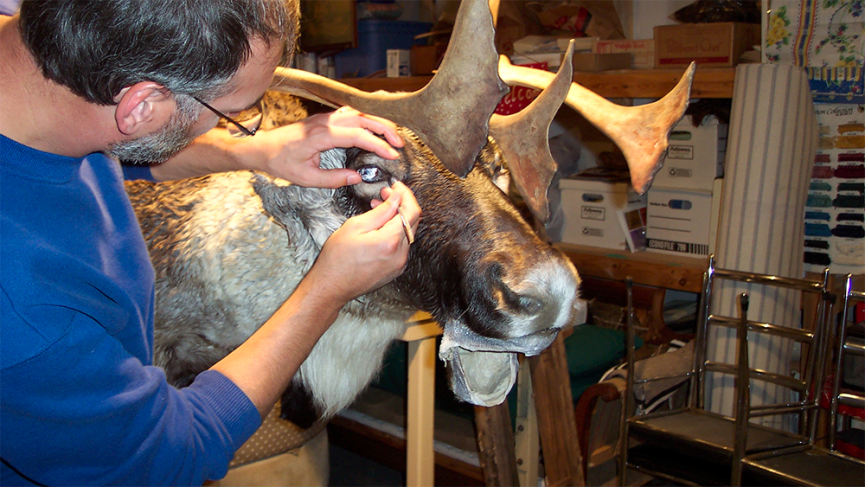
 Without dragging this out to far, once everything has been test fit and the ear liners installed the hide is pulled into place and tucked in around the mouth nose and eyes. I like to use pins to help hold the skin around the eyes and nose until it dries. The “cape” is cut up the back of the neck to the antlers during the initial skinning or “caping” and now the taxidermist has to sew it back together making sure everything stays in place. After the sewing he will make small adjustments to the skin to help give it a lifelike look. The last step is to trim & staple the excess hide to the back of the form.
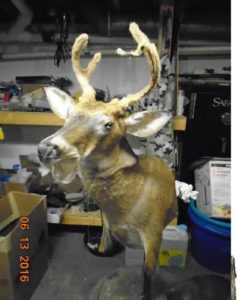
Now the mount will be set aside to dry, the taxidermist may occasionally make small adjustments as the hide dries. Once everything has dried it’s not easy to make changes.
I usually wait a week or two at least before finishing the mount by painting around the eyes and nose. The use of an airbrush and that artistic ability along with knowledge of what a deer really looks like is key here.

Blackie The Bear chattin’ with Tony The Tiger
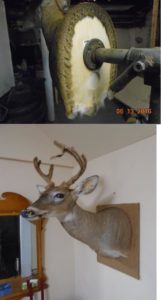 I do taxidermy as a hobby, a couple of the professionals I know put a lot of time and effort into each mount they do. The finished product is well worth the money spent and the time we wait to get it back. My last piece of advise on the subject is to think about where you will hang your mount before you go to the taxidermist. This will help you determine the pose and form needed. There are a variety of poses and turns available in forms to match almost any size deer and pose you want and most good taxidermists are able to alter forms to create any pose you want, at an additional cost, of course.
Jim can be reached at: jkushner.wgd@gmail.com
He is a life long resident of Michigan with an equally long love of fishing, hunting and the outdoors.
He and his wife have lived happily on a small piece of land in northern Michigan for the past 30 years.
They retired a few years ago and Jim spends most of his free time trying to get caught up on all the home improvement projects that he should have done on his days off instead of hunting and fishing.
He will likely tell you that he never tires of sitting in the deer woods where all of the worlds problems are easily solved.
- Backpack into the Ontario “bush” for Lake & Brooke Trout - February 13, 2026
- My 50th Year Anniversary! - December 7, 2023
- A Methodical Deer Tracking Effort Can Minimize Mistakes - December 21, 2022